
 Small transformer Small transformer
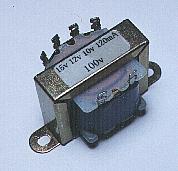
This transformer changes AC 100 V into AC 15 V. More than 14 V voltage must be applied to the input of the 3 terminal regulator for 12 V. The maximum input voltage of the regulator is 30 V. In case of the transformer which was used this time, the output in case of the no-load was to do being of AC 18.0 V. It was to do being of DC 21.7 V when rectifying it at the diode bridge.
The maximum output current of the transformer is 120 mA. Generally, the maximum electric current is decided in the thickness of the wire on the secondary side. Even if it passes more than 120-mA electric current, it isn't broken immediately. When passing more electric currents than the specification, the output voltage sometimes declines from the specification. Also, the insulation of the transformer sometimes becomes bad with the heat when using long beyond the specification electric current.
| The specification of the transformer which was used this time is hereinafter. |
| Size | : 36 mm (W), 26 mm (D), 31 mm (H) |
| Weight | : 90g |
| Input voltage | : AC 100V |
| Output voltage | : AC 10V, 12V, 15V |
| Output current | : 120mA |
Voltage regulator
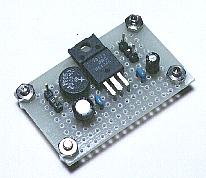
AC 15 V output of the transformer are changed into the DC voltage by the full-wave rectification with the diode bridge. After that, it is made the stable DC 12 V with the 3 terminal regulator.
Input terminal
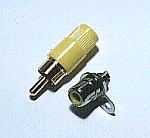
This is the terminal to input the audio signal.
I used the RCA jack.
Variable resistor for the level adjustment
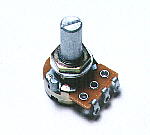
It adjusts the level of the input signal with this variable resistor and it makes it fit in with the detection level.
It adjusts for the lamp to do the flash beautifully.
Control knob
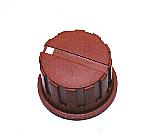
This is the control knob for the level adjustment.
The installation hole is 6 mm. The axis diameter of variable resistor must be fitted.
Shielding wire
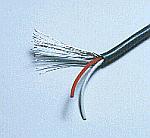
I used the shielding wire to make the influence with the alternating voltage little for the input wiring of the audio signal and the level controller.
Terminal cover

I put the terminal cover to the connection part of the wiring for doing the improving of the look.
AC cord
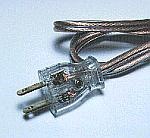
I used the cord with the transparent cover. I used the one where the AC plug is made of the transparent plastic, too.
Cord protector
It used the cord protector for the hole which lets through the AC cord as the design.
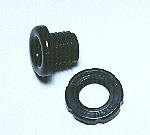
Lug terminal
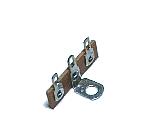
I used the lug terminal to fix the AC cord.
Fuse
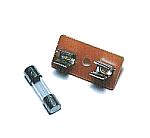
I put the small fuse of 1 A for the safety.
AC outlet
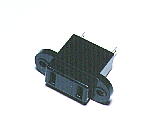
I used this outlet for the outside lamp connection. This is usual AC outlet in Japan.
The other connector is OK but must use the connector to have considered the voltage of the external circuit to use.
Case
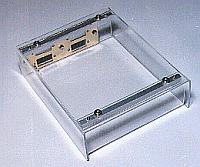
I bent the acrylic board and made the case. I used the transparent acrylic board to be able to see the inside.
Leg

I installed the plastic leg at the bottom of the case.
Panel
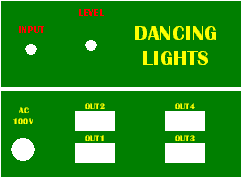
I put the panel to the front and the back. The panel is made with the OHP sheet which was printed in the color. I stuck the panel on the case using the glue.
Lamp
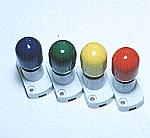
I used the small lamp with the 4 colors as the outside lamp. It is beautiful if using the lamp for the Christmas tree.
|