|
The making of the acrylic case for the dancing lights controller |
|
I housed the dancing lights control unit in the transparent acrylic case for the circuit inside to be able to be seen. The acrylic resin board with the 2mm thickness is used for the acrylic case. As for the equipment which bends the acrylic board, refer to "bending apparatus-2".  I considered the size of the circuit to put inside and made the size of the case the 120mm width, the 40mm height, the 140mm depth. There is a several mm error because there is a bend part. The structure of the case is the simple type which combines the part in the body and the part of the lid.  The outlet to connect the outside lamp is put to the back side of the case. The power is necessary to attache or remove the plug to the outlet. So, there is possibility that the acrylic board breaks when the body and the lid aren't tightly fixed. 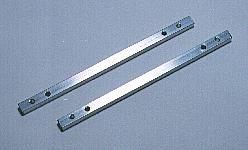 At the screw of the acrylic board, it is insufficient. Therefore, I used the aluminum square stick in the 6mm for the female screw and fixed the lid. I opened the 2mm holes on both sides of the stick to fix it on the body. Then, I made the 3mm female screws inside from the 2mm holes for fixing the stick on the body, using the tap. Two sticks are used for the front side and the rear side. 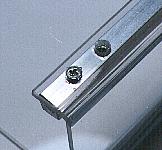 I used the plate screws of 2mm to fix the aluminum stick on the body. By using the plate screw, the crack between the body and the lid by the head of the screw isn't made.  The lid is tightly fixed with the 3mm screws.  The holes of the four outlets and of the AC code are opened on the rear side. The hole of the outlet is 20mm x 11mm. So, the strength of the rear side acrylic board becomes weak. Therefore, I am reinforcing the outlet fixed portion with the brass board with the 1mm thickness.  After making holes to install the parts, the case making will be END. |