 Swap the pins of the IC ( Pinswap ) Swap the pins of the IC ( Pinswap )
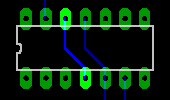
When drawing logic circuits such as the NAND or the inverter in the schematic, it sometimes wants to modify the position of the pins of the IC according to the position of the part. In such a case, the wiring to pins can be replaced when using a pin swap function.
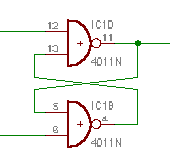
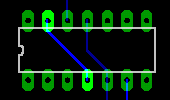
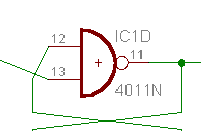
The position of the pin which is drawn on the schematic is put in young order from above. Usually, it is drawn like the schematic on the left. However, it is not an efficient pattern at the board. Too much simply this example so you have the possibility not to find out a necessity.
 Method of swapping pins Method of swapping pins

It becomes pin swap mode when you push the Pinswap button.
(1)
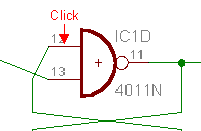
Click the pin to swap. |
(2)
The wiring replaces when clicking the other pin. |
(3)
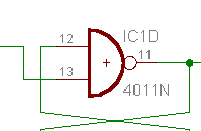
Arrange wiring using Move and Split.
However, it is better to reverse the top and the bottom of the symbol to be mentioning later. |
 Condition of the Pinswap Condition of the Pinswap
 The pin which it is possible to swap is except swap level 0. The pin which it is possible to swap is except swap level 0.
The pin that the swap level is 0 can not be swapped.
 It is effective in the same swap level. It is effective in the same swap level.
The pin which it is possible to swap is the pin which has the same swap level. When making more than one pin group which it is possible to swap in the same symbol, it sets a different swap level.
 It is effective only in the same symbol. It is effective only in the same symbol.
In case of above-mentioned example, the swap between the 12th pin and the 13th pin is possible and can not be swapped for the other NAND pin in the same IC.
 Replace the top and the bottom of the part Replace the top and the bottom of the part
As the show by the previous example, in the Pinswap, the position of the pin doesn't change and wiring is swapped. In this case, the schematic isn't beautiful. The flow of the schematic is smooth when reversing top and bottom of the symbol.
There is not a command which reverses the top and the bottom of the part. However, Mirror exists as the command which reverses either side of the part. Top and bottom of the symbol can be reversed by the combination of this and Rotate exists as the command which reverses either side of the part. Top and bottom of the symbol can be reversed by the combination of this and Rotate . .
(2)
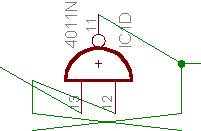
This is in the condition of (2) of the previous example. This is in the condition after swapping the pins. |
(3)
It rotates by 90 degrees on the left when clicking a symbol after pushing the Rotate button. |
(4)
Either side of the part is reversed when clicking a symbol after pushing the Mirror button. |
(5)
It becomes the original direction when clicking a symbol three times after pushing the Rotate button.
You can find that the top and the bottom of the symbol is reversed compared with (1) of the previous example. |
|

