 Tie wirings ( Bus ) Tie wirings ( Bus )
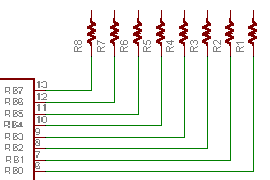
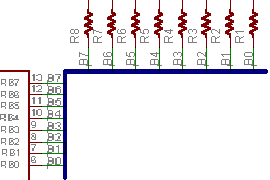
In case of the circuit like the I/O port of the CPU, it sometimes draws more than one line in parallel. In such a case, the schematic becomes complicated and needs the space to draw too. The schematic can be drawn in the simple by using BUS.

The method of wiring respectively |  |

The method of using BUS |
 |

The same patterns can be drawn. |
 Drawing of a BUS line Drawing of a BUS line

Push the Bus button and draw a bus line on the schematic.
 Setting of the BUS name Setting of the BUS name

Set the number of the lines to tie in the name of the bus.
When pushing the Name button and clicking a bus next, the dialog which sets a name is shown.
 |
The setting form of the name is hereinafter.
Name[Lowest Index..Highest Index]
It places two colons ( . ) between the Lowest Index and the Highest Index with no space.
| Name : |
Set a name by the alphanumeric.
The name must not end with digits. |
| Lowest Index : | It is equal to or more than 0. |
| Highest Index : | It is equal to or less than 511. |
|
| In above example, it sets with b[0..7]. This name is used for the label of the wiring. So, I think that the short name suits. |
 Wiring to the BUS Wiring to the BUS

Click the Net button and connect the terminal of the part and the bus.
 |
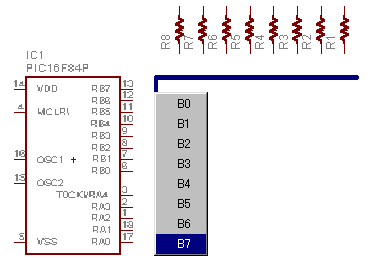
When clicking the terminal of the part as the start point and clicking a bus as the end point, the wiring name list of the bus is shown. All names from the Lowest Index to the Highest Index are shown in this list.
512 name lists are shown when setting from 0 to 511.
Wiring is done when a connecting name is clicked.
The bus is one line but the wiring is distinguished between in this name. So, at the part with correspondence, the same name should be specified. |
 Attaching the bus wiring name Attaching the bus wiring name
In the bus, more than one line is expressed by one line. Because it gets not to find out the condition of the wiring just as it is, it attaches a label to each wiring.

A label icon is used to attach a label to the wiring.
The name of the wiring is added when clicking a label icon and clicking the wiring which attaches a label.
To change the position of the label, it pushes the Move button and drags + mark of the label. Also, if pushing the right button in the condition, an angle is changed.
The position of the label moves along the grid. When the position of the label doesn't become an appropriate place, it adjusts a grid interval. |
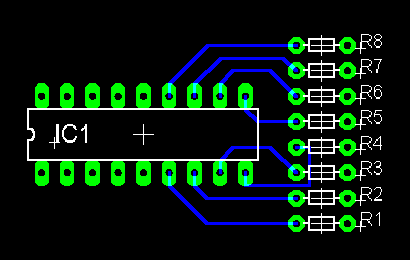
 At the board, it is wired according to the wiring name.

|


